


Pneumatic Wet Edge Master WS-C1
Industry First! The Pneumatic Wet Edge Master WS-C1 Anyone Can Use
Bringing craftsmanship closer to everyone.
Long chamfering work that once required the skill of experienced professionals can now be done easily by anyone.
・Lightweight air tool for effortless operation!
No need for heavy electric machines or costly automatic equipment. With its smooth handling, your work efficiency increases dramatically.
The WS-C1 weighs only about 1 kg, yet delivers high-speed, high-torque performance. Perfect for chamfering long kitchen countertops and opening edges.
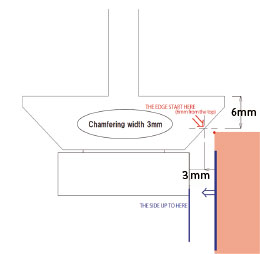
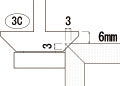
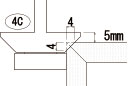
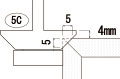
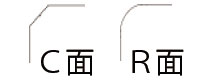
・3-5 mm flat chamfering supported!
By simply adjusting the mounting position of the specialized diamond tool according to the chamfer width, you can easily perform flat chamfering from 3 mm to 5 mm.
In addition, by changing the diamond tool, R-shaped chamfering can also be performed.
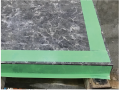
・Wet Processing means Zero Dust!
Wet processing greatly reduces dust, creating a safer and more environmentally friendly workplace for both workers and the surrounding environment.
Specifications
Rotation Speed : 18000 r.p.m
Max Working Pressure : 0.4~0.6 Mpa・80PSI
Air Consumption : 16 CFM・450 L/Min
Output : 0.24 kw
Compressor : 3.76 kw(0.5 HP)
Weight : 1.05 kg
Collet Size : 6φ
Instruction for Use
1.Surface Protection
Cover and protect the surface of the tile (stone) to be processed with masking tape.
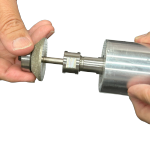
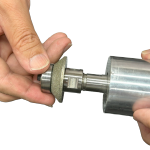
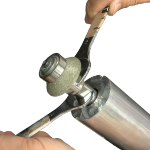
2.Attach the Specialized Diamond Tool
Mount the special diamond tool (beveler) onto the WS-C1 main unit.
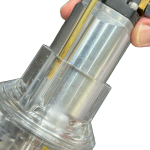
3.3. Attach to the Base
Set the WS-C1 main unit onto the base.
Insert the water pipe into the insertion hole at the top of the base, push it all the way in, and temporarily secure it.
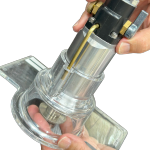
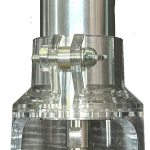
4.Adjust the Width
Adjust the position of the main unit and the base according to the required chamfer width.
Once the position is set,tighten the clamp firmly to secure it.
5.Test Run
Before starting the actual work, always perform a test run to confirm that the chamfer width is correctly set.
6.Safety Precautions During Operation
Take great care to keep your hands away from the openings, and move the main unit in the direction of the arrows indicated on the base.
7.Finishing Tips
For a more beautiful finish, perform chamfering in two or more passes rather than trying to finish in a single pass.
Q & A
Q. What materials can it be used on?
A. It can be used not only on natural stone but also on artificial marble, cultured marble, and ceramics.
Q. Which diamond tool should be used?
A. Always use the designated special diamond tool.
Q. Is polishing possible?
A. Grinding and chamfering are possible; however, polishing is currently under development. Two steps of the specialized diamond tool are prepared, so please select the step according to the type of material.
Q. What is the recommended polishing process?
A. We recommend first processing the chamfer with Step 1 of the specialized diamond tool, then hand-polishing with #400 and #800 grit. Finally, finish using AKEMI’s Transformer. The process may vary depending on the type of material and desired finish, so feel free to experiment.
Q. Is R-shaped chamfering possible?
A. Processing 3R and 5R chamfers is possible. We can also provide diamond tools in various shapes—please contact us for details.
Q. Is it possible to manufacture diamond tools in various shapes?
A. Yes, with a little lead time, we can manufacture the shape you need.
